
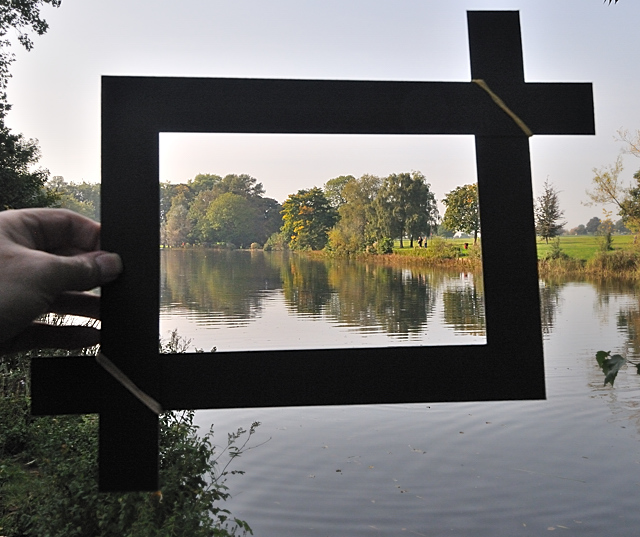
We will be talking about the Rule of Thirds when macro photography is concerned, as well as patterns in composition and negative space that can be used to direct the subject's movements. These tips can help beginners get better at composition. Listed below are some composition tips that you should definitely keep in mind. These tips will enhance your photographs. These tips can be used for creating a unique and artistic portrait.
Rule of thirds
To make a picture more appealing to the eye, you should follow the rules of composition. The left-hand vertical grid line should have your main subject in the center. This will give the image a balanced appearance. You can have multiple subjects, but you need to place them on opposite sides of the frame. This will prevent the image from becoming too crowded. The background should be the same. Leave plenty of background space.
The most common mistake beginners make when shooting landscapes is to center their subject. It is easy for beginners to make the mistake of focusing on the subject too much, especially in fast-paced scenes with subjects moving away from their camera. You can avoid this issue by using elements in the scene. You can use the rules for thirds to create backgrounds that suit all types of photography. These are some helpful tips:
Rule of thirds in macrophotography
Although you might have heard of the Rule of Thirds before, did you know it could also be used for macro photography? The most basic rule in photography is that your subject should fill at least three-quarters of the frame. This simple rule can allow you to capture beautiful macro images of your subject. It's not all you have to do in macro photography. To make your images standout, experiment with different compositions.
For macro photography, you must first divide your subject in thirds. This allows you to determine the location of your subject. You can place a stem of flowers along a vertical gridline. Or, you can position the flower head at one intersection of two gridlines. This will help make your macro photo look dynamic. Remember to use the Rule of Thirds while post-processing.
Patterns in composition
The patterns you see in a photo are everywhere. They can be found in nature as well as in man-made structures. Although we might think the outdoors is the best place to find patterns, they can also be found inside. It is important to be attentive and search for hidden details. Here are some examples of good ways to use patterns in your composition. You can easily create an appealing composition by using patterns.
The use of patterns in your composition can make photos more interesting, and help to create scale and context. It can also increase contrast, clarity, as well as depth. Broken patterns can be used to enhance the composition. Broken patterns can create a sense satisfaction and tension in the viewer. Photography patterns can be extremely helpful for composition. It is worth looking out for them.
Leaving negative space in direction of subject's motion
There are many ways that negative space can be incorporated into a composition. It is easiest to eliminate everything except your subject and background. Many news scenes and TV commercials feature subject matter against a white background. In these cases, the subject becomes the focus. The "negative space" can be used in the direction that the subject is moving to draw viewers' attention, while also maintaining a sense of balance.
Negative space left in the direction of the subject's movements can add drama and mystery to the composition. Because our eyes naturally follow the lines of our subjects' gazes, it can help to implement Rule of Thirds. Your subject will look better if they are placed in front of a wall. When taking portraits, it can be useful to leave some distance in the direction of your subject's movements.
FAQ
Where can I buy cameras?
There are lots of places online where you can buy cameras. We recommend purchasing from a trusted retailer such as B&H Photo Video. They are able to assist you with any questions.
B&H ships quickly and securely to make it easy for you to get your order to your door.
This video will help you learn more about buying cameras.
What is a good camera bag?
Camera bags are essential for protecting your gear during travel. These are some important things to keep in mind as you choose a bag.
-
The bag should be large enough to comfortably hold your accessories and cameras. Don't go bigger than you think you will need.
-
Durability: You should look for bags made from durable materials, such as canvas, nylon, leather, and polyester. Avoid fabric and plastic bags.
-
Protection: Make certain your bag is protected against dirt, dust, moisture, and scratches
-
Organization: To make it easier to find what you need, organize your gear according to type. So, you can place your lenses in one box, your memory cards in another and your battery charger in a third.
-
Comfort: Instead of carrying a bag, use a shoulder strap. Look for comfortable designs with padded straps.
-
Price: Check around to find the best prices. Brands may offer discounts on their products, which can prove to be a plus.
-
Warranty: Check to see if the company offers a limited warranty. This will allow you to know who to contact if your bag becomes damaged.
What can I do to improve my photography skills with my phone?
You don't need expensive equipment to take great photos! You can take amazing photos with just a phone.
It is easy to learn how to use its various features and some basic techniques.
There are many apps available for both Android and iOS devices that make it easy to edit and share your pictures.
Here are five tips to help get you started taking better photos.
-
Set Up Your Camera App. Your camera app should come pre-installed on your device. If your camera app isn't installed on your device, download it from Google Play.
-
Use filters and effects. You can change the look of your photo with filters and effects without even touching it.
-
Adjust the exposure. Adjusting exposure helps you control the brightness of your picture.
-
Take the right lighting. Photographing in bright lighting makes it easier for you to see details within your subject. If you shoot in low light, it is possible to capture shadows or highlights in your photo.
-
Photograph People. Photographing people can show others what you are most passionate about.
For more information on how to take better photos, read our article: 5 Tips to Improve Your Photography Skills With A Smartphone
Statistics
- This article received 13 testimonials, and 100% of readers who voted found it helpful, earning it our reader-approved status. (wikihow.com)
- That's the easiest way to get blurry photos 100% of the time. (photographylife.com)
- In this case, 100% of readers who voted found the article helpful, earning it our reader-approved status. (wikihow.com)
- The second easiest way to get blurry photos 100% of the time is to use a cheap filter on the front of your lens. (photographylife.com)
External Links
How To
How to photograph in low light conditions
Low-light photography means taking photos in dimly lit areas. It requires special equipment. The key challenges are in controlling exposure, white balanced, and sharpness. There are two kinds of low light photography. Flash photography works best when there's enough light around. A flash is required if there isn’t enough light. Without a flash, it is possible to get a poor picture if the subject is indoors and not outdoors. A flash is not necessary if you aren't interested in shooting at night with the moonlit hours. You'll be able to capture beautiful colors and shadows this way. Another option is taking photos at twilight. Twilight is when the sun sets but there's still daylight.
Also, you might want to try long exposures. Long exposures enable you to take images even after your shutter has been open for several seconds. When the shutter remains closed, the camera records only light that falls on the sensor. This light continues to fall onto a photo sensor throughout a prolonged exposure. The shutter is still closed so no light can enter the lens. Therefore, there is very little movement. You can ensure clear images by turning off automatic settings such as autofocus or autoexposure. Adjust the ISO setting before you start to shoot. An ISO setting of 200 will give you more control over the brightness or darkness of your image. Once you are ready to click the shutter button, make sure it is fast. The shutter will close completely. Next, hold the shutter button down until the end. By holding down the shutter button, you prevent additional light from entering the camera. Once you have taken the image, wait for a few seconds before you release it. This allows the camera to process the image. While waiting, you can check out your photos on your computer screen. Once you are satisfied, save them on your computer.