There are many things to take into consideration when shooting drone photos. It is crucial to learn how to use camera settings like ISO, shutter speed, or aperture to get the best shots. A drone's ND filter is an indispensable tool. They can help you get more creative and create more interesting photographs.
Rules for composition in drone photography
You must follow certain composition rules when using a drone to shoot. For example, if your drone is equipped with a wide angle lens, it's important to avoid any shots that show the spinning blades. You should also ensure that there are no obstructions that might interfere with the signal. For drone control and visibility, strong signals are essential.
A drone can take photos at up to 400 feet above the ground. By taking photos from this high, you can prevent the drone from hitting any obstacles. This will save you the hassle of cropping after the fact.
ND filters
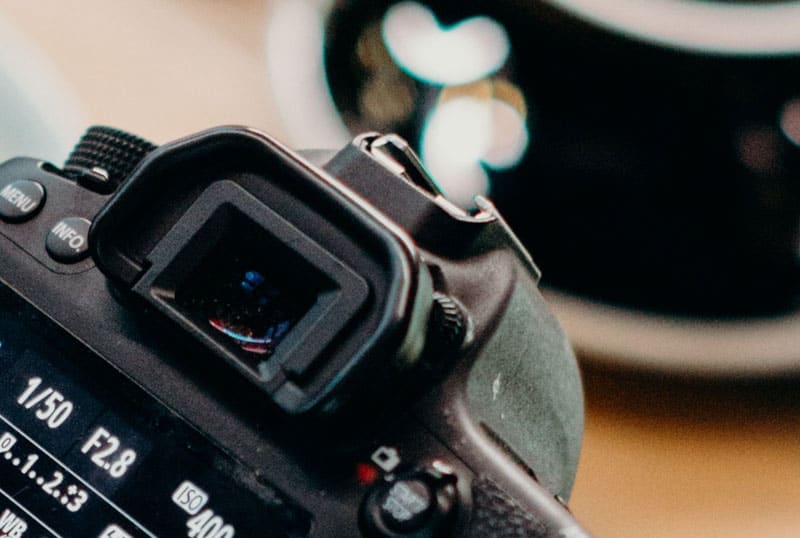
ND filters are a great way to get cinematic-quality footage from a drone. They work by adjusting the shutter speed to reduce the amount of motion blur. Ideally, the shutter speed should be around 1/50 second at 25 frames per second or 180 degrees for best cinematic results.
ND filters have two purposes: to improve contrast and color definition, and to blur motion. They are very effective for photographing scenes that have moving people or objects such as fireworks. They provide information to the drone owner about how their photos were exposed.
Stacking filter
It is important to stack filters in drone photography. The photographer can get a better shot by using different filters. For example, an ND can smoothen water on long exposures while a CPL can minimize reflections in midday sunlight. You can also stack filters for greater flexibility.
ND filters are most commonly used for drone photography. They reduce light so that the image looks cinematic. They can also be used to create long exposure shots. These filters reduce light entering a camera lens. It allows videographers shoot at a faster shutter speed. Polarizing filters can also be used. These filters darken the sky to make colours pop and enhance their vibrancy. There are many types and strengths of ND filter, so it is important you choose the right one for you.
Using a composition grid
It is important to use the correct elements when creating a composition grid for drone photography. The ideal composition is created by overlapping each frame by 1/3. A third image should mirror the second, and the fourth should copy the third. It is important to understand the drone's Field of View, so that you can determine how far apart to place photos.
You can use the grid by turning on the grid on the screen of your camera and moving the center crosshair. Next, compose your shot. Once you've created your shot click on the screen and focus the camera drone. Allow the drone to take five frames before you adjust the focus.
Flying a drone
It is important to keep these things in mind when you fly a drone for drone photography. First, make sure you know the best orientation for your camera. This will ensure you get the best possible results. When taking photos of the subject, you should aim the camera downwards or upwards. This will give viewers an idea of the scale of the subject based upon its size.
The drone's controls should also be known. These controls control how much power your drone has to fly. The drone's throttle controls how much power it draws from its motors. It also has controls for yaw, which turns the drone counter-clockwise. The drone can also move left or right using its pitch and roll movements. To avoid potential dangers, it is important to go through a checklist before you start flying a drone. This checklist should only take a few minutes.
FAQ
Is photography a good job?
Photography is an art that allows you take pictures and share them. If you are willing to work hard, photography can be a great way for you to make money. If you want to become a professional photographer, there are many ways to do this. As a hobby, you can take photos of friends and relatives. This will improve your skills and increase confidence. Once you have successfully completed this stage, it is possible to move on with paid assignments. The best photographers can make a living as a photographer. Photographers may be asked to photograph people at parties and weddings. But most professionals prefer commercial work such as advertisements or product shots.
The key to becoming a successful photographer is to find out what type of photography you enjoy. Then practice, experiment, and try new techniques until you get comfortable with the process. You can't replace experience so don’t expect to be successful overnight.
It is important that you first learn technical skills in order to be able to focus on creativity. Photography can be both artistic or technical. You will be able to succeed quicker if you learn how to use the right tools, and the basics of composition.
It is important to consider whether you are interested in a full-time career or if you would like to work part-time. Many people combine their passion for photography and other jobs. It is possible to work as a freelancer while you are at the local newspaper. Others decide to dedicate all their free time to photography. Whatever your creative choice, you will need to be dedicated and committed to success in every field.
A serious photographer will have to dedicate a lot more time and effort if they want to build a successful career. Think carefully about whether or not you are really ready to give your time and effort to this type of endeavor.
What is the rule to thirds in photography
The rule-of-thirds is a simple way to create interesting compositions using no complicated camera settings. It divides the image horizontally or vertically into nine equal pieces. This divides your image into three areas that you would like to see your subject. These areas are the top, middle and bottom. These areas can be used to position your subject within your frame.
The rule of threes can also help you avoid placing important items too close together. They might not have enough space to make an impact on the eye if they are placed close together. You might find that they lose focus if you place them too close together.
How do I learn to take photos on my own?
There are many ways you can learn to take great pictures. You could buy a book, attend a class, join an online community, watch YouTube tutorials, etc. But if you want to master the art of taking pictures, there's nothing better than doing it yourself! That way, you have complete control over what goes into each photo. As long as you continue learning, you will always be improving.
The best thing about digital photography? You don't need any expensive equipment. You only need a computer and an internet connection to take pictures. The rest is up for you.
Here are some tips to get your feet wet:
-
Learn how to use the manual settings on your camera.
-
Learn how to use the basic controls.
-
Photograph lots.
-
You can edit them.
-
Share them.
-
Keep practicing.
-
Experiment.
-
Take a look at the world from different perspectives.
-
Use light sources creatively.
-
Practice makes perfect.
-
Be willing to fail.
-
Be patient.
-
Have fun
What camera is the best for beginners, and why?
The best camera choice for beginners is determined by your budget, skills, and needs.
If you are looking to save money, then a point and shoot digital camera might be the best option. These cameras offer good quality but aren't very versatile.
The Digital Single Lens Reflex (Digital DSLR) camera allows you to interchange lenses, allowing you to take different kinds of photos. They usually cost more than point-and-shoots but give you much greater flexibility.
For those new to photography, a beginner's kit is a great place to start. Everything you need, including a flash, tripod, memory card and camera body, will be included in the one-pack.
Make sure to purchase extra batteries.
What equipment is necessary to begin digital photography
When you start out in digital photography, the first thing to consider is which type of camera you will use. There are many choices, including DSLRs (digital one-lens reflex cameras), point and shoot compact cameras, camcorders, smartphones, and camcorders. Each offers different features and benefits. DSLR cameras are more expensive and weigh more than other types of cameras. Point-and shoot cameras are smaller, lighter and have more automatic settings. Camcorders can record excellent video and have some still photography modes. Smartphones can be small and lightweight and are easy to transport.
Once you have made your decision on the camera type you wish to purchase, it is time to decide if you want to buy a used one or a brand new one. Even if the cameras were bought in the last few decades, they can still be purchased at reasonable prices. Newer models cost more, as manufacturers spend a lot of money on developing new technology.
Next, you will need to purchase lenses. Lenses are a critical part of determining the quality your photos. These lenses allow you control the focal length of your lens, which allows you to zoom into the scene and not lose focus. Some lenses are equipped with flash units built in, while others require external flash units. A wide range of lenses is available from various brands, each offering unique characteristics.
Finally, you'll need to buy memory cards. Memory cards save pictures taken with your camera. Your card's size will determine how many pictures it can store. If you plan to shoot lots of pictures, you will need multiple memory cards.
Statistics
- In this case, 100% of readers who voted found the article helpful, earning it our reader-approved status. (wikihow.com)
- This article received 13 testimonials, and 100% of readers who voted found it helpful, earning it our reader-approved status. (wikihow.com)
- That's the easiest way to get blurry photos 100% of the time. (photographylife.com)
- There are people out there who will pick at flaws they can only see in 100% crops of your photos. (wikihow.com)
External Links
How To
Lightroom and Photography: How to Use it
Adobe Lightroom can be used by photographers to easily edit photos. It lets you import images from multiple sources into one place, where they can all be viewed, edited and cropped. You can also share them online, print them, or email them.
Lightroom provides editing tools such cropping and adjusting brightness, contrast and color balance. Lightroom also has a collection of presets that makes it easy to apply common effects, such as vignette (lens distortion correction) and black &white conversion. The best thing is that these adjustments can be applied automatically after you export your image.
Adobe Bridge allows access to Lightroom. This allows you browse your collection and organize your files. You can even add keywords in your images to help you find them later.
If you're new to Lightroom, start with the free version. This will give you the most basic features. There are two options for upgrading: you can buy the full edition or subscribe.
Lightroom can downloaded in many ways. One option is to purchase the software directly from Adobe. Another option is to download the trial and convert it to a full-featured license. Here's how you can do it.
-
Lightroom Trial Version
-
Launch the program and click "Convert to License" at the bottom of the window.
-
Enter your payment information and select the type license you wish (permanent, one year)
-
To continue, click "Continue".
-
Once you have converted the trial version to a paid license, you can continue using it until the end of the term.