There are some camera settings that you may be wondering how to change. The f-stop and aperture settings are two of the most common, but you can also use the shutter speed and ISO settings. The ISO and F-stop settings allow you to control how much light is captured by your camera. These are some ways to adjust your settings. These tips will allow you to take better photographs. These settings will allow you to achieve the best possible results for your photographs.
Modifying the f-stop
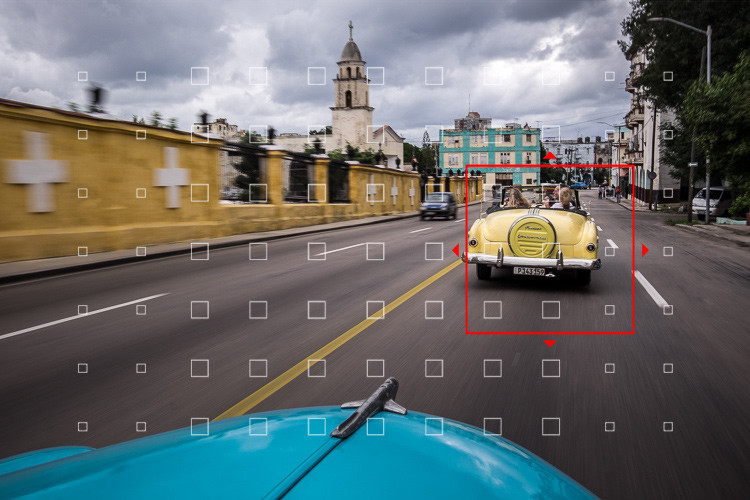
The camera can be controlled by changing the fstop. It allows you also to control the shutter speed. The shutter speed and f-stop can be controlled by one wheel. Your camera's AV button controls shutter speed and aperture. Advanced cameras come with dual wheels. If you're not sure how to change the f-stop on your camera, you can consult the Camera Settings Chart for more information.
You can easily change the fstop of your camera. After changing the shutter speed or f-stop, you'll see a change in the photos. A smaller aperture will result in a lower fstop, while a larger aperture will result in a greater fstop. For example, a camera with an f/1.8 aperture will capture more light than one with an f/4 aperture.
The aperture can be changed
You can take photos even in low light conditions by changing the aperture of your camera. If the aperture is wider, more light can enter the camera. But if it's narrower, the light will be blocked and the image will appear darker. The ISO and shutter speed are the other camera settings that impact exposure. You can easily change the aperture with your camera once you understand what you are doing. Continue reading for more information.
Knowing how to set the aperture is an important step in learning how manual mode works. Many photographers don’t know how they can properly set the aperture. It is the most important part of a photo. This setting is not available on all cameras. Instead, use aperture priority mode. This will enable the camera calculate the right shutter speed for the scene, and then choose the best aperture to make the scene look its best.
Modifying the shutter speed
Changing the shutter speed on your camera will help you to get a better exposure. This setting affects the amount of light that passes through your camera sensor. The shutter speed is automatically set in the auto or manual shooting modes. You can adjust shutter speed with the Smode to have more control. Here are some tips to alter the shutter speed in your camera.
Firstly, find the setting for your camera's shutter speed. Many cameras let you change the shutter speed in increments of 1/3 or 1/2. Shutter speeds are usually displayed on the main LCD. On point-and-shoot cameras and DSLRs, the shutter speed is displayed around the image. Pressing the info button cycles through the various on-screen displays. Alternativly, you can press the "exposure” button on your camera's control panel.
Modifying the ISO
A basic technique in photography that you should know is how to adjust the ISO setting of your camera. You may need to adjust your ISO value to compensate for poor lighting. Your camera comes with many ISO settings. These can prove to be useful in different situations. These tips will help you choose the best ISO setting. Remember to set the ISO correctly for each scene.
Your photos will be brighter if your ISO is increased. Higher ISO numbers will result in more noise. However, if the noise is not too bad, you can still take pictures with high ISO settings. If the noise in your photos is less than you'd like, changing the ISO might be a good idea. It's important to know when your ISO needs to be used.
FAQ
How can I be a great photographer?
Photography is an art form that requires practice, patience, dedication, and above all else, passion. Photography is a passion. You will be able to do much more than if your goal was to make a buck.
You need to learn how to use your camera properly. Understanding composition, lighting, exposure and depth of field are all important. A good understanding of Photoshop is also necessary.
Photography is not easy, but once you master it, there is nothing quite as satisfying as creating images that capture moments in time that would otherwise have been lost forever.
Learn more about the subject and then take classes or participate in competitions to enhance your skills. You will gain confidence and experience, which can lead to improvements. What equipment are you looking for?
It all depends on what type photography you do. For example, if you are interested in landscape photography, you will need a wide-angle lens.
If you're interested in portrait photography, you should get a telephoto zoom lens.
When taking photos, a tripod is essential. You can stand back and compose the picture, without having to move.
A camera bag can be used to carry your camera, memory cards, or other accessories.
If you are using a compact lens, a flash is needed.
A DSLR (Digital Single Lens Reflex), camera is the best choice for novice photographers who wish to create professional-quality images.
DSLRs are great because they let you control every aspect in your photo including shutter speed (aperture, ISO sensitivity), white balance, focus and white balance. They also provide a range of features such as autofocus, auto-exposure lock, self-timer, bracketing, and RAW format.
How do I get started with digital photography?
The first thing you should consider when starting out in digital photography is what type of camera you want to use. There are many choices: DSLRs (digital single lens reflex camera), point-and shoot compact cameras and camcorders. Each offers different features and benefits. For example, DSLR cameras offer high-quality images but are typically larger and heavier than other types of cameras. Point-and shoot cameras are smaller, lighter and have more automatic settings. Camcorders have excellent video recording capabilities. They may also offer still-photo shooting modes. Smartphones are small, light, and easy to carry around and offer great image quality and many advanced features such as GPS mapping, music playback, and Internet browsing.
Once you've chosen the type of camera that you want, you can decide whether to purchase a used or new model. Even if the cameras were bought in the last few decades, they can still be purchased at reasonable prices. New models generally cost more because manufacturers spend large amounts of money developing new technology.
Next, you will need lenses. The quality of your photos is directly affected by the lens. They enable you to adjust the focal length of the lens so that you can zoom into the scene with no loss of focus. Some lenses include built-in flash units. Others require external flash. There are many brands that offer a wide variety of lenses, each with its own unique characteristics.
Finally, you will need to invest in memory cards. Memory cards save pictures taken with your camera. Depending on the size of your card, it could hold hundreds or even thousands of pictures. You will need multiple memory card if you plan on taking many photos.
What can I do to learn photography?
There are many ways you can learn to take great pictures. There are several options. You can read a book, go to a class, or join an internet community. But if you want to master the art of taking pictures, there's nothing better than doing it yourself! You have full control over the final product. You'll only get better as long as your learning continues.
In fact, one of the best things about digital photography is that you don't even need expensive equipment. All you need is an internet connected computer and a camera. The rest is up for you.
Here are some tips to get you started.
-
Make sure you are familiar with your camera’s manual settings.
-
Learn how to use the controls.
-
Take lots of photos.
-
These should be edited.
-
Share them.
-
Keep practicing.
-
Experiment.
-
Explore different perspectives and angles.
-
Use light sources creatively.
-
Practice makes perfect.
-
Do not be afraid to fail.
-
Be patient.
-
Have fun!
Statistics
- This article received 13 testimonials, and 100% of readers who voted found it helpful, earning it our reader-approved status. (wikihow.com)
- By March 2014, about 3 million were purchased monthly, about 30 percent of the peak sales total. (en.wikipedia.org)
- There are people out there who will pick at flaws they can only see in 100% crops of your photos. (wikihow.com)
- In this case, 100% of readers who voted found the article helpful, earning it our reader-approved status. (wikihow.com)
External Links
How To
How to take photographs in low lighting conditions
Low-light photography can be defined as taking photos in dimly lit and dark environments. It requires special equipment. The key challenges are in controlling exposure, white balanced, and sharpness. There are two kinds of low light photography. Flash photography works best when there's enough light around. You will need a flash if you don't have enough natural light. A flash might be necessary if you are photographing a subject indoors and outside. Try shooting at night, during the moonlit hours, if you don't need a flash. This will give you some beautiful shadows and colors. Another option is shooting at twilight. Twilight occurs when there is still daylight but the sun has set.
You might also be interested in long exposures. You can record images even after the shutter is closed for several minutes. The camera records only light that falls on it if the shutter is not closed. This light continues to fall onto a photo sensor throughout a prolonged exposure. The shutter was not opened, so no new light entered the lens. Therefore, there is very little movement. Turn off autofocus and autoexposure to ensure you get clear images. Also, make sure that you adjust the ISO setting before you start shooting. A 200 ISO setting gives you greater control over how dark or bright your image looks. Next, click quickly on the shutter button to capture the shot. This will bring the shutter completely to a close. Hold the shutter button down for the final second. You will prevent additional light from entering your camera by keeping the shutter button down. Once you take the shot, wait a while before you release the shutter. This allows your camera to process the picture. While your image processing is taking place, you will be able to view your photos on your screen. Once you are satisfied with the photos, save them onto your computer.